As you may know, the famous Mail Merge Outlook function that Microsoft introduced more than a decade ago has endured almost every iteration of the Microsoft Office family. Today, we are going to describe its use in Microsoft Office 2007.
Mail Merge in Outlook 2007 works the same as in other Microsoft Office family releases and targets the same goal: the creation of convenient and efficient mass mailings with some degree of personalization while drastically improving the work process for the people in the field. It allows creation of bulk email letters to each individual on a mailing list, using a single message / Word document, by employing “Macros”, which serve as placeholders for data taken from an external “data-source” and are replaced by the actual values when the messages are generated.
The resulting letter will contain only the recipient-related information, complete with his/her unique First and Last names, business addresses, job positions, specific date and/or time, and other information. The letters will also contain a recipient’s name and/or email address as the only one visible in the “TO:” field, protecting the privacy and anonymity of the rest of the recipients from each other and serving as a regardful and professional touch, which most people certainly appreciate.
In our previous articles on Mail Merge in Outlook, we mentioned that the feature offers multiple ways of achieving your mass mailing tasks, and Mail Merge in Outlook 2007 is not an exception. Mail Merge allows a user to create a mass personalized mailing using the standard Office 2007 interface; therefore, it is present in most task-specific Office applications: Word and Outlook.
To conduct a mass-mailing activity in Outlook, Mail Merge is accessed via the following routine:
1) While in Outlook, navigate to the “Contacts” tab and select any contacts you wish to include in your recipients list (it is recommended to switch the default “Current View” of the Contacts tab to the category mode by using the “View -> Current View -> By Category” menu; this allows selection of the contacts in a more convenient fashion.
2) Next, navigate to the “Tools -> Mail Merge…” menu to evoke the Outlook Mail Merge dialog window:
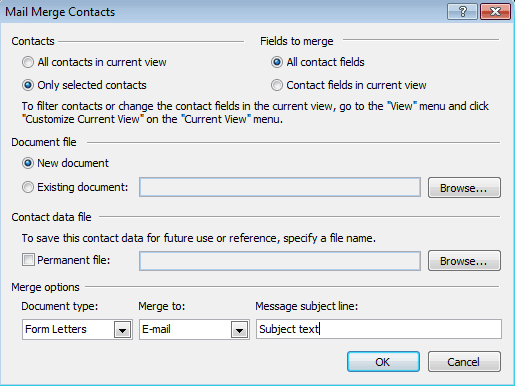
3) Since for this example we are using selected contacts only – you must specify the type of contact selection by choosing the “Only selected contacts” option rather than “All contacts in current view”.
4) Next, set the document type and merge type options to “Form letters” and “E-mail” respectively to conform with the default mail merge structure.
5) Type your subject text in the “Message subject line”.
6) Finally, press “Ok” and continue writing your text in the Word document, which is used as an external editor for the Outlook Mail Merge.
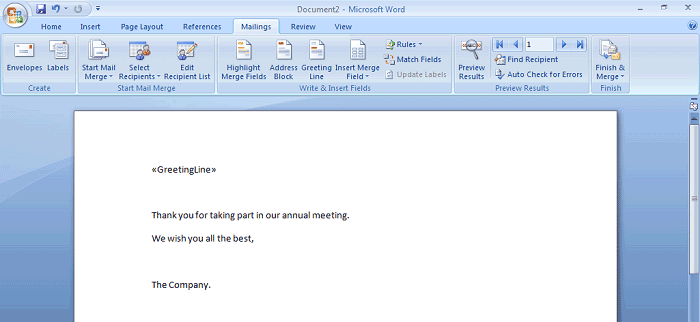
Once in Word, it would not be a bad idea to start with the greeting line for your Mail Merge Outlook mailing: navigate to the “Mailings” ribbon tab, and click “Greeting Line”. Note that you can freely modify the greeting text to suit your task.
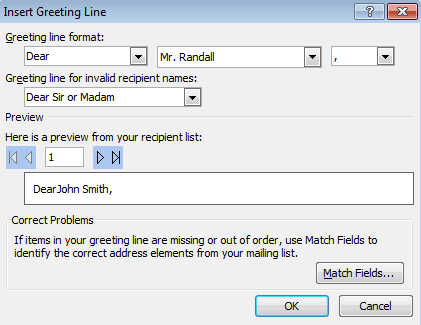
Following the greeting line is the message itself – take your time and compose after the greeting line. You can also use macros with any field from the Contact information in your Address book with your Outlook Mail Merge mailing by clicking the “Insert Merge Field” button, located on the “Mailings” tab within the Word ribbon.
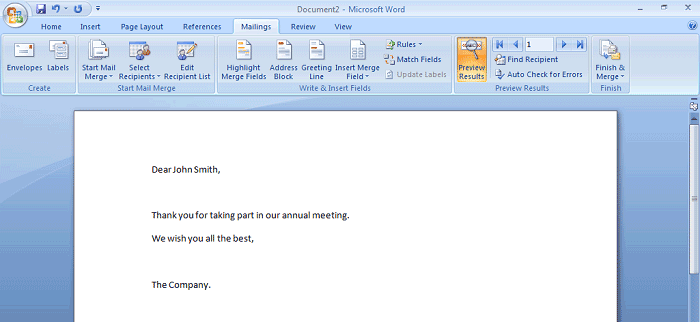
After all macros are inserted and your message is composed, you can preview the results prior to sending the actual letters by clicking the “Preview results” button located to the right of the “Write & Insert Fields” ribbon block that you previously used. Note that you can switch between the draft messages of every intended recipient by clicking the little arrow buttons beside the main one.
Now, you can send your electronic mailing! Locate the rightmost button on the “Mailings” ribbon tab named “Finish & Send”, click it once, and choose “Send E-mail Messages…”.
After that, you will see the “Merge to Email” window, which will allow you to modify your subject line. It is recommended to keep the default values for the mailing when using Mail Merge in Outlook for the first time.
Clicking “Ok” will transform your document into simple e-mail messages and send them using the standard Outlook message sending procedure – you can even track these letters in the “Outbox” and “Sent Items” folders.
Now you know how to perform a Mail Merge in Outlook 2007 using Word as an external document editor. Let’s see how to perform a Mail Merge using Word alone.
1) While in Word, locate the “Start Mail Merge” button on the “Mailings” ribbon tab, click it and select “Step by Step Mail Merge Wizard…”.
2) In the first step of the wizard, choose “E-mail messages”.
3) The second step is unnecessary if you wish to produce your text from the ground up, but you can choose to use an external document by selecting the given option.
4) In the third step, you can choose either to use Outlook Contacts folder as your contacts source, or to use an external data-source. An external source is more flexible than Outlook Contacts, because you can create your own fields with any kind of custom information about your recipients for mailings using Mail Merge in Outlook 2007.
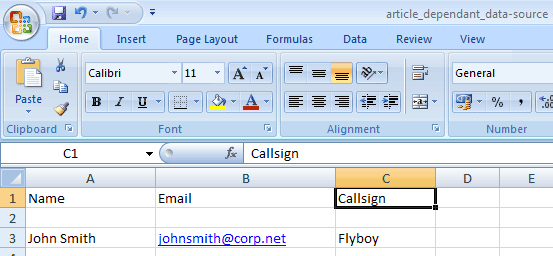
If you choose to use Outlook Contacts as your data-source, you will be able to sort (include or exclude) any recipients for this Outlook Mail Merge mailing in this step.
5) Step Four will allow you to include the Greeting Line you are now familiar with, as well as some other special fields – we will skip them this time to concentrate on the essential procedures.
6) Step Five will enable you to sort the list of your recipients once more before the final step.
7) Step 6 – here you can pull up the familiar Word “Merge To Email” window and proceed with generating your messages for Outlook and sending them to recipients.
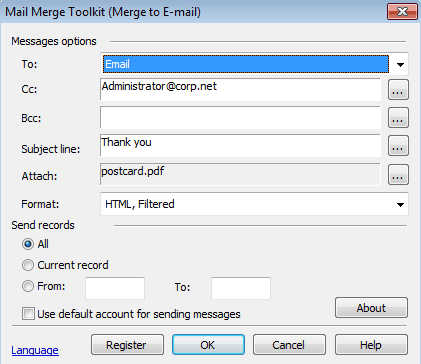
When the Mail Merge Outlook 2007 feature came out, it was a worthwhile usability upgrade from its previous incarnation – Mail Merge in Outlook 2003, but it still was missing some things that were desired by professionals involved with the Office productivity tasks and mailings. Even the most recent Office family additions still lack much-needed features. That is why we at MAPILab have programmed them into our own Mail Merge Toolkit. This add-in “upgrades” Outlook Mail Merge with the addition of such features as the ability to include a custom subject line, custom attachments, the option to send a document as a PDF attachment (as well as avoiding an empty message body with the addition of Message Body Templates), and many others features.
